Sunday, May 13, 2012
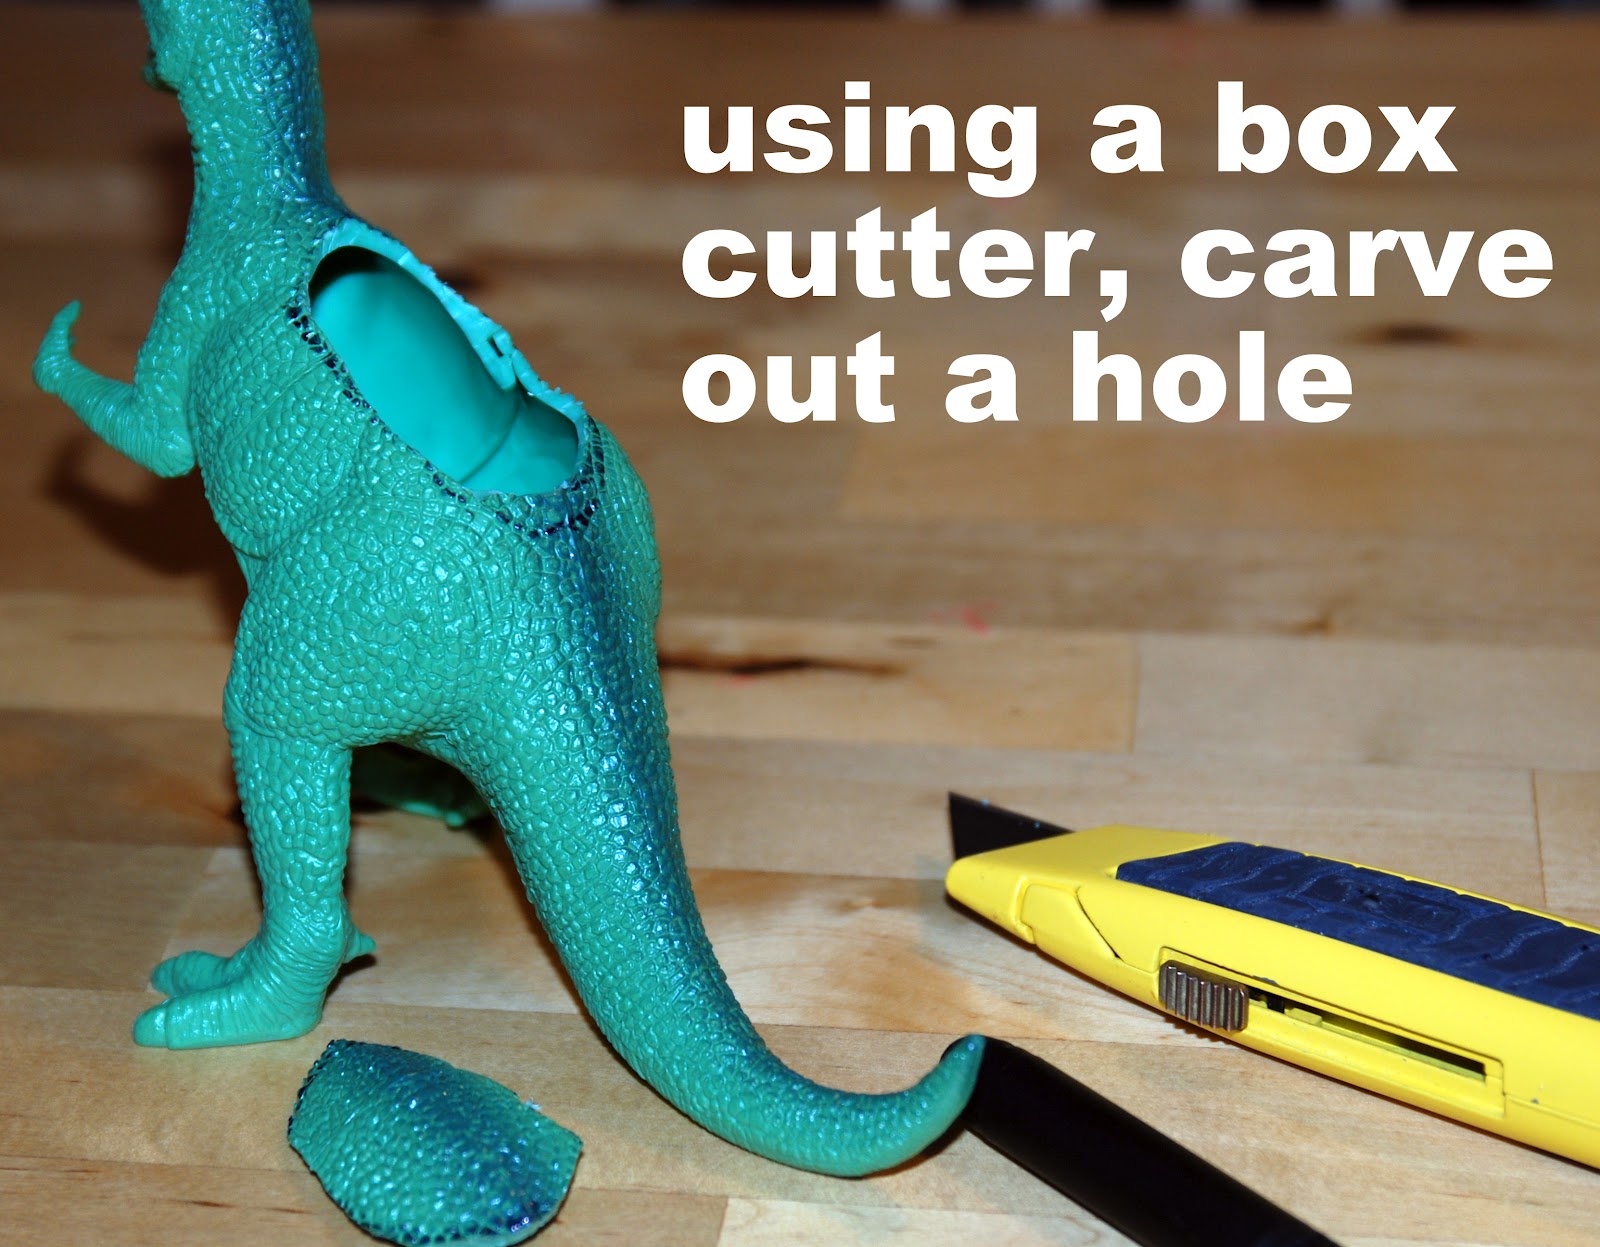
RAWWWR Dinosaur DIY Planter
Friday, February 24, 2012
Craft FAIL! Linocut Goodie Bags
I had grand plans to make drawstring fabric goodie bags for Lilly's birthday party. She is having a "dog" themed party so I thought some sort of custom design or applique would be cute. Then I found all my old Lino cut tools from college when I was rooting around in my studio. That inspired me to make a "birthday pug" Lino block and stamp the image on fabric. My first step was to draw out the design and transfer it onto the lino block. That is done by rubbing a pencil on the backside of the paper, laying the paper on the lino block and then tracing the design, leaving a transfer imprint on the block.
Then you carve...
One bit of advice when you are carving. Work on a non-slip surface. I made the mistake of working at our butcher block kitchen table and the cutting tool slipped and went straight into my index finger. I was terrified for a minute that I was going to have to go to the hospital and have my plastic surgeon called in (who also specializes in microvascular and hand surgery, specifically hand reconstruction and digit reattachment.) Anyway- I wrapped it up with sterile pads and tape, kept pressure on it and the bleeding eventually stopped. It's a really nasty injury, 10 days later it still hurts.
But I powered through and finished carving:
My plan was to stamp this design on fabric using textile paint. Here's how that turned out:
Yea- pretty lousy. I did about 8 of these and I couldn't get consistency in the ink and transfer. Moving on to plan B: buying paper bags and stamping the design on with traditional lino cut ink. Ummm, yea.....not working either:
The bags aren't flat, and I tried all different positions, lifting the flap, nothing worked. Accepting that lino blocks are NOT like traditional rubber stamps (there's no flexibility or "give" - you need to have even hard pressure to get a good imprint), I conceded and found some "sticker back" textured cardstock in my studio stash and stamped the design on different color squares. Now I'll have to cut out the design and stick them on the bags.
Not really what I was going for, but I think in the end it will look good. Plus the 5 and 6 year olds getting these bags aren't going to give a hoot about the design aesthetic of their goodies bags...it's the stuff inside that counts.
Sunday, February 12, 2012
Fab Find - Swiffer Wet Jet Pads, DIY Cleaning Solution & How to Refill Wet Jet Bottles
Here's what I got from Detroit Knitter:
This is my own combination of ingredients: 2 tablespoons of ammonia, ½ cup of vinegar, ½ teaspoon of Johnson baby shampoo and fill the rest of the container with water. I came up with this combination while researching the properties of the different ingredients:
1. Ammonia is an awesome cleaner and spot remover
2. Vinegar kills bacteria, mold, and germs and it's a great rinse agent
3. Johnson Baby shampoo smells good and seems to add a sparkle to the floor (don't try to use an off name brand - they streak!).
Read more: How to Make Your Own Non-Rinse Mop Solutions | eHow.com http://www.ehow.com/how_2101538_own-nonrinse-mop-solutions.html#ixzz1mBqBn7DX
Friday, February 10, 2012
A Diaper Bag Wrangler DIY Tutorial - Reusable Swiffer Dry Dusting Sweeper Cloths
Version 2 : fitted cloth (uses version 1 as your base)
Version 3 : Fitted Fringe Cloth (uses version 2 as your base)
Monday, July 25, 2011
Fab Find - Lil Blue Boo Pieced Tunic Pattern
I came across this pattern from Lil Blue Boo few weeks ago and it jostled something within me. Unfortunately I did not bookmark the page and yesterday when the inspiration hit an all time high, I could not for the life of me remember where I saw the pattern. So I scoured through my internet browser history... to not avail. So then I started google-ing crazy search terms...until I found it. And when I found it- I bought it. (and it's only $12 what a steal!!!) And after I bought it, I immediately printed it.
![]() |
| http://shop.lilblueboo.com/ |
Okay- so back in the day - September 1992, I saw the most amazing concert of my entire life. U2 Zoo TV. It was at Busch Stadium in St. Louis and I was a Freshman in High School. So being a young, hip "alternative" type teenager I bought my concert tee and wore it dotingly for years. And then I went away to college and packed it away, saving it for another time. And I saved it - for 19 years. (!!!) I had been thinking about what to do with these few bits and pieces of my younger years, and when I saw this pattern from Lil Blue Boo, I KNEW this is why I had been saving this shirt for all those years.
On to the pattern.... this pattern is 1. EASY , 2. VERSATILE, 3. AWESOME! All of the directions are very clear and explained in a practical way so anyone with basic sewing skills can follow. The pattern templates are fabulous- with numbered dots to align the 8.5" x 11" printed pages to create the 3 larger pattern pieces for the tunic pattern. The sizing is very accurate, and allows for endless modifications.
I decided to go with a size medium pattern- which is for chest measurements up to 36". Its a perfect fit- snug but not tight. I may add about 1" another time to try a more roomy/"flowy" top. I decided on some coordinating tshirts from our pile of "clothes to donate", including a Tommy Bahama shirt that was my husbands. I will say this- the mens shirts worked well for the larger "bottom pieces", because I could use 1 entire piece. Once I had all the pieces cut out, it was a simple feed through my 4-thread serger. The only issue I had was the material I used for the neck and arm trim. I was SUPPOSED to use something with stretch, but I REALLY wanted to use the burnt orange color from the tee I used on the bottom back. It was just a regular cotton jersey - no stretch. So I had to MacGuyver the neck trim by ruching into a v-neck...which came out PERFECT in the end! I shortened the tank by a few inches and serged along the bottom hem.
I CAN NOT WAIT to try out some other variations. I think using some lighter weight / stretch jersey will be a better material to work with (duh- like the pattern says), but in the end there is NOTHING I would change about my re-do U2 tee. Thank you, thank you, thank you - Lil Blue Boo!!!
Thursday, June 9, 2011
DIY - Sewing Machine Cone Thread Conversion
One of my biggest pet peeves when sewing is thread. More speficically the a) expense and b) always running out. My dream is to invent a never ending bobbin for straight stitch machines. It seems like I am winding bobbins endlessly, and running out at the most annoying times. Sergers are great because they sew forever before having to change the thread. So I came up with this trick for machines that have a vertical thread holder (technically called a spool pin). This machine pictured has both a horizontal spool pin (on the right) and a vertical one that's actually a removable "accessory" on the left. The vertical one is technically just for bobbin winding and double needle stitching, but for me it's my primary spool pin. So here is how I convert my straight stitch machine for cone threads:
| 1. spool pins, this conversion only works on vertical pins |
| 2. place an empty 125 yd thread spool on the vertical pin |
| 3. put the cone over the empty spool |
| 4. optional - *see notes below |
| 5. thread machine as instructed |
| 6. ta-da! You are ready to sew! |
Okay- all machines are different and I have step #4 pictured but you may or may not need/want to do it. I do this step on THIS machine because of where the vertical spool pin is (kinda in the middle of the machine). It is very close to the upper thread guide, and I have found that I need some extra tension and space so the thread doesn't get all caught up in the spool pin. So I take the thread and pull it to the far right, so it goes around the outside side of my bobbin winder guide and I pull the thread back across and then thread my machine like instructed. This makes the thread feed mimic the set up of the horizontal spool pin... you know- the one I never use! There's no guide or anything for the thread when I put it on the bobbin guide but I have found this works really great for me. I have a different machine where the vertical spool pin is on the far right side and I don't need to do anything "makeshift" when threading that particular machine. My best advice is to play around with this technique and see what works for you. The cone thread will spin around the small empty spool, which basically acts like a holder for the cone.
Thursday, January 27, 2011
Get Crafty - Marshmallow Creations
| mmmmm...icing. |
What you need:
marshmallows
toothpicks
icing
| my marshmallow igloo |
| Lilly's marshmallow "snowgirl" |
| yummy, crafty goodness |
Tuesday, August 10, 2010
Tutorial - NO SEW Tutu
Every little girl loves playing dress up in a tutu- here's a super simple version that even kids can make. No sewing involved!
Materials:
1. Goody "ouchless" Adult Size Headband - they come in a multi-pack and can be bought at Target, Giant, Rite-Aid etc.
2. Tulle, ribbon or fabric - I prefer the 6" width tulle that comes in rolls from the craft store. Make sure if you buy ribbon it does NOT have wired edges! (You can make about 1 tutu with one 25 yard roll of tulle.)
3. Scissors
Directions:
1. Determine how long you want the tutu to be
2. Cut strips of tulle/ribbon/fabric 2x the desired length. About 40 cut strips of tulle are needed for a "full" tutu.
3. Tie each strip of tulle/ribbon/fabric in the middle - just by making a knot - all the way along the headband until desired fullness.
Glue (with Fabri-tac or craft glue) silk flowers or gems to the ends of ribbon
Tips:
These tutus can be completely and totally customized for your child. You can make them really full, or keep it simple. These make great party favors for birthdays, or a cute gift.
Sunday, August 8, 2010
Tutorial - Using Applique to Embellish Clothing
Why are BRAND NEW CLOTHES such a MAGNET for spots and stains? It drives me crazy, but by using a simple applique, you can not only cover those stains, but personalize any article of clothing....AND it's easy! Today I am going to show you (in 2 parts) how to use applique to embellish really anything (stained or not!).
Materials Needed:
Clothing (shirt, dress, bag, etc)
Fabric Scrap
Steam a Seam 2 (or other applique adhesive, found at fabric shops)
Iron
Scissors
*Extras-hand sew on buttons or ribbon trims, use decorative stitches with a sewing machine!
Instructions:
1. Cut out rough shape for fabric applique
2. Peel off 1 paper backer of Steam a Seam and press fabric onto adhesive
3. Cut out desired shape (can also use a die cutter machine!)
4. Peel off 2nd paper backer and position applique onto clothing
5. Use hot iron and press for 10-15 seconds (check instructions for exact timing)
Options:
Use zig zag stitch and machine sew along edges of applique
Hand sew on buttons or ribbon bow trims.
Part 1 Video shows basic applique:
Part 2 Video shows optional embellishments (machine sewing and button details):
Thursday, April 29, 2010
Tutorial - How to Make a Memory/T-Shirt Quilt
A Memory Quilt is a great way to re-purpose sentimental clothing. You can use really anything including t-shirts, jackets, pants, tops or childrens wear. Your first step is to think about what you want this quilt to commemorate- a graduation, childhood, a lost family member? Sort through the clothing and select several pieces to use- look for a similar theme or color scheme. There is no “right way” or “wrong way” to make your quilt. This is purely a guide to assist you in creating your own unique memory quilt. There are no specific measurements given, as each quilt will vary.
Materials
T- shirts: 12-16 shirts minimum
Adult clothing: 4-6 pieces minimum
Child clothing: 8-12 pieces minimum
Infant/toddler clothing: 12-20 pieces minimum
*it’s better to have more pieces and edit out what you don’t want
Fusible Stabilizer: for any materials that are made of jersey/knit, rayon, silk or other lightweight fabric. The stabilizer will help keep the shape of your squares and prevent shifting, bunching or puckering when you sew. There are tons of options for stabilizer, bit I prefer Pellon SF101 Woven Stabilizer for this project. Tip- When you cut out the stabilizer squares, you can use the remnants- just line them up and iron on.
Batting : you can purchase pre-packaged or by-the-yard batting. It comes in a variety of loft, and blends- for this project I recommend a “crib size” (45” x 60”) or Twin Size pre-packaged batting that is a thin loft of cotton/poly blend. You can also use a layer of flannel or fleece fabric as your batting.
Backer Fabric: you can use any type fabric for the back side of the quilt. “Quilting weight” cotton fabrics work well because they are typically a standard 45” wide which happens to be the same width of the crib size batting. If you are making a larger size quilt, you may have to sew 2 pieces of backer fabric together to equal the correct width. Flannel or fleece also works well. Buy equal length/width backer fabric as your batting layer.
Embroidery Thread: also called DMC Floss, this will need to coordinate with colors of the quilt.
Embroidery Needle
Large Safety Pins
Straight Pins
Scissors
Thread (white and/or coordinating)
Rotary Cutting System (or you can make a paper template for tracing your squares)
Iron
Sewing Machine
Before you start cutting up your clothes, think about what you want this quilt to look like. Are all the squares the same size? Are they large, small? Are there rectangles and squares? The possibilities are endless. But you need to think about the overall design so you have a mental guide before you start cutting.
Step 1: Cut up your clothing. I like to cut the sleeves off shirts first, and then cut along the seams (or the sides), and then the collar to get individual panels of fabric to work with. T-shirts can yield front and back panels. Long sleeve shirts can yield front, back, plus 2 thinner sleeve panels (good for smaller squares). Pants- I cut along the inner seam and open up the leg, skirts cut on one side and open up. Be creative and don’t be afraid to include decorative trims like pockets, embellished seaming or buttons.
Step 2: Take a look at your fabric pieces. Sort them by size and decide which pieces you want to use.
Step 3: Iron on the fusible stabilizer (according to the manufacturer’s directions) to the back side of any pieces that need it. T-shirts (knits), silk, jersey and rayon should all be stabilized. Men’s dress shirts, and similar weight fabrics do not need to be stabilized, but give them a quick press to get out any wrinkles.
Step 4: Decide on your square size. Make sure your pieces will accommodate this size. It’s best to use a rotary cutting system for this but you can also make paper templates to trace around. 10" x 10" - 12” x 12” squares are good for t-shirts, but don’t be intimidated to cut smaller squares so you can mix/match. Basically any size square between 6” – 12” is ideal. If you are going to piece smaller squares together to make a larger square, make sure you add extra seam allowance. For example, your squares are 12” x 12” but you want to make a 12” square panel out of 4 smaller squares. Each smaller square should be 6.25” x 6.25”, so when you sew them together (with a 1/4“ seam allowance) the final piece will equal 12” x 12”. You may need to do a little math to figure it all out.
Step 5: Lay out your squares. Find a large flat surface (floor, dining room table, etc.) and start laying out your pieces. It might take a few tries to get everything matched up, but once you are happy with the layout TAKE A PICTURE. (Even if it’s a poor quality picture with your camera phone.) This will be a helpful reference if the pieces get out of order when sewing, or if you have to store the project while you are working on it.
Step 6: Sew the squares. Working across one row at a time, pin the squares together. You can do one square at a time, or pin all the squares in an entire row at once…whatever you are most comfortable with. Use a 3/8” seam allowance. Once you have a row sewn, press the seams (either open or to the left or right- whatever works best for you).
Step 7: Sew the rows. Working from top to bottom (or bottom to top) -take one row and pin to the next row. When pinning it’s best to start in the center and work your way out lining up the seams as you go. This will give you nice, aligned corners once all the pieces are sewn together. Once all the rows are sewn together, press the seams.
Step 8: Batting. Lay the batting down on your large flat surface and do your best to smooth it out. Lay the quilted squares front panel on top – SO THE RIGHT SIDE IS FACING YOU (and the wrong side is facing the batting). Take your large safety pins and pin every 6” to 10” through the top panel AND the batting layer. This will help prevent shifting. Trim away any excess batting from the edges.
Step 9: Backer fabric. Lay your backer fabric FACE DOWN (so right side of backer fabric and right side of quilted squares are facing) and pin all around perimeter. Trim away any excess fabric.
Step 10: Sewing and Quick-turning. Sew along the perimeter of your quilt, with a 3/8” seam allowance; leave an opening of around 8” – 10” on one edge. If you are making a quilt larger than 45” x 60” leave a slightly larger opening. After the perimeter is sewn, cut the excess fabric from the corners. Removing the fabric here will aid in getting nice “pointy” corners. Be sure that you DO NOT cut through the stitching. Make sure you have removed all the straight pins from perimeter. Put your hand through the opening and turn the quilt “right side out”. Poke your finger in each corner to push the corners out. You might also want to run your hand along the inside of the quilt along the seams to get everything straight and lined up.
Step 11: Press and top-stitch. Pressing at this step is completely optional but I think it makes topstitching easier. Press the edges along the entire perimeter of the quilt. Fold in the fabric along the opening and pin closed. Using a coordinating color thread, topstitch along the entire perimeter of the quilt, making sure you “catch” the opening and sew it closed. A topstitch should be around 1/4” to 3/8” from the edge.
Step 12: Hand tying. You will use a coordinating color embroidery thread and a needle for this step. Decide if you want the “ties” to show on the front side of the quilt or the back side. (I prefer the back). At regular intervals (typically at the corners of each square, but around every 6” or so) you want to sew up and down through all 3 layers and make a double or triple knot. Trim the ends so they are about 1” long. Repeat this until the entire quilt is tied. *Tip- you can also embellish the hand tying with buttons.
Step 13: Finishing touches. Remove all the safety pins and look for any threads that need trimming.
*Note - I am not a quilter... I am a "practical sewer". This project is simplified so anyone with basic sewing skills can complete this project without feeling overwhelmed. I have taught this project at the ACPPA Community Art Center located in Norristown, PA and for the Spring-Ford Community Education Department. Here's one of my student's finished quilt:


